Part 44: Behind The Fangs, Part IX - RPG Maker Basics: The Events, Part II
Behind The Fangs, Part IX - RPG Maker Basics: The Events, Part II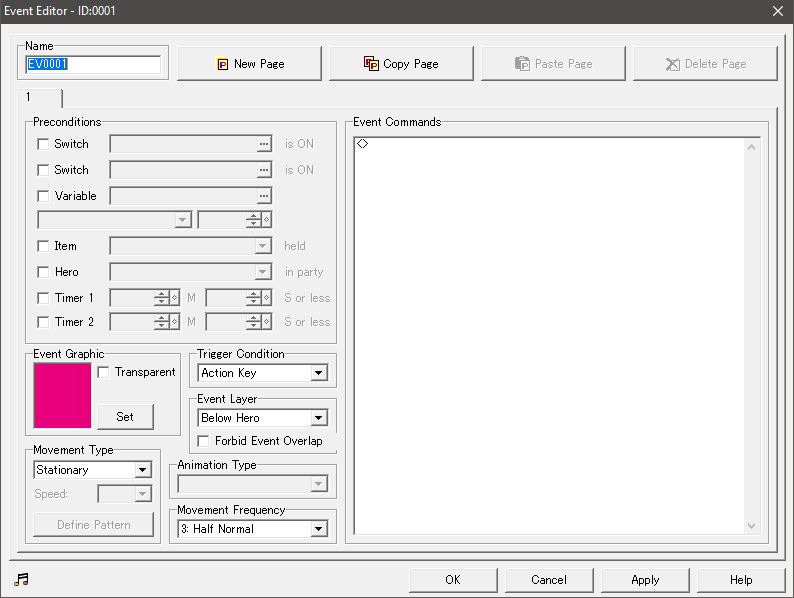
♪ BGM: Foreboding ♫
Alright. Here we are. Deep breaths, everybody. What we're going to be doing in the next few chapters is go over how to use the different event commands. We're not going to go into detail with all the shit you can do with them if you get really creative, that'll come later. For now, just the basics. Now, if we double click on the line in the event commands indicated by the "<>", we get to enter our first event command. This opens a window like this:
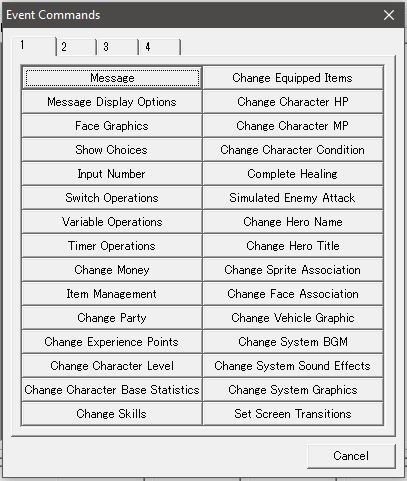
As you'll note, there are four pages of event commands. We're not getting through this in one clean shot - though the last page is only two commands, so it's only three full pages, really. Let's just take it from the top and see how far we get.
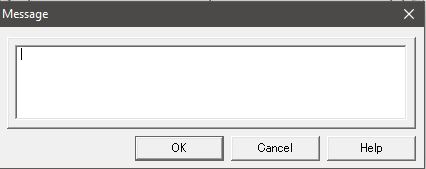
Message allows you to do exactly that - display a message. Now, there is a lot of stuff to pay attention to when it comes to messages, and thankfully, the help file has a good list of them. The first thing to note is that a line of text can hold 38 characters if you display a face graphic alongside it, and 50 if you don't. This isn't indicated in any way, so you better remember it. Also, there's a lot of control characters that can output different things. Here's the list from the help file:
code:
\	 Shows "\".

\c[n]	 Changes the text color to the color that matches n, n being a number from 0 to 19.

\s[n]	 Changes the text speed to n, where n is a number from 1 to 20, 1 being the fastest.


[n]	 Displays the name of the hero in the database with ID n, n being any numerical value.
         (
[0] will show the name of the first member in the current party)

[n]	 Displays the value held in variable n, n being any numerical value.

\$	 Shows the amount of money held.

\!	 The remainder of the message after this code is only shown when the player presses a key.

\.	 Adds a 1/4 second delay to the part of the message which follows this code.

\|	 Adds a 1 second delay to the part of the message which follows this code.

\> / \<	 Displays the part of the message between \> and \< instantly.

\^	 Closes the message window without key input.

\_ Shows half a space.- The input for one message box is limited to 4 lines of 64 characters. If a lot of control codes are used, the number of letters which can be displayed in the box is reduced.
- When you reach the character limit on a line, additional characters entered will be ignored. It is necessary to press enter to go to the next line.
Yeah, the whole character limit deal can be a real fucking pain in the ass.
- Control characters such as color change are processed even while the message is being shown.
- The colours which can be shown using "\c" are determined by the system set used.
- The control character must be directly after the \, otherwise it won't work.
- The control character can now be nested inside , to show a hero name based on a variable, in the format [ [x]].
Nested functions, fun shit.
Anyway, that's about it for actually entering messages. However, we're not done with messages yet, because we have another menu of shit to go through.
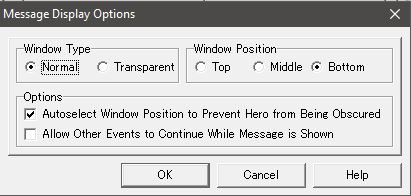
Message Display Options is thankfully a very simple menu. Everything here should be pretty much self-explanatory. Note that "transparent" means that the message window is straight up just not shown, just the text. Also, these settings persist through different events - so if you set the display options one way for a specific event, you need to remember to set them back after that.
But wait, there's more!
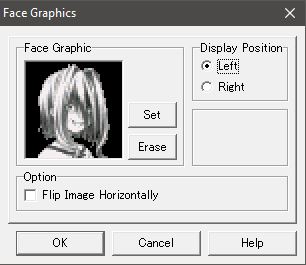
Face Graphics is exactly what it says on the tin. This is where you set the face graphics that are to be displayed with the text. The options here are once more fairly simple, nothing really needs to be explained here.
Note that this is a separate command - so you first set the face graphics, then you have your messages. Then, if you want to change the graphics, you have another face graphics command, then more message commands. Also, this only applies for the current event, so you start with a blank face graphic for every new event.
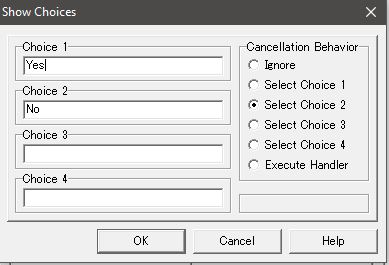
Show Choices is one way for you to have branches in your events. You can set up to four choices (though you can have more with a "more choices" option that leads to more choices if you really want to) and also have a custom handler for what happens if you cancel the choice. You can either forbid cancelling, make it select a certain choice, or even have it be a choice of its own. This then leads to an event that can look something like this:
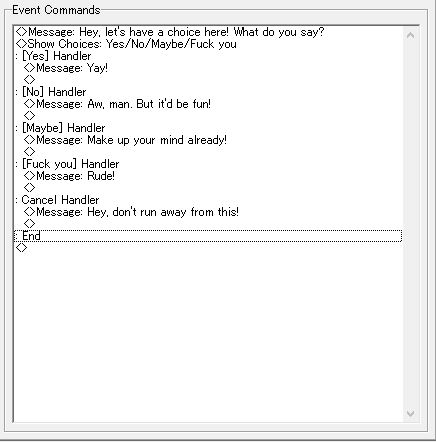
You'll note that the stuff that happens after the choices is indented a bit. This is to make events easier to parse visually. It can get pretty complicated down the line if you have complex events with many branches. Finally, there's one more option that revolves around a message box.
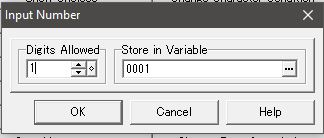
Input Number is exactly what you think it is. The game allows you to enter a number that can be anything from 1 to 7 digits and then store it in a variable. Once you have it in a variable, you can do all sorts of stuff with it, as we'll see later. Otherwise, nothing much here.
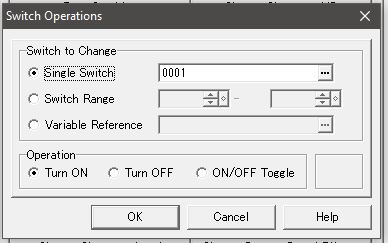
Switch Operations is one of those very simple but incredibly vital commands. Switches are one of the arteries of RPG Maker - tons of shit requires switches to do right, and this is where you change them exactly the way you want them to. You have some options to what switches you want to change - either just one specific switch, all switches in a certain number range, or a switch that has a certain number based on a certain variable, and then you can either turn the switch on, turn it off, or toggle it to the other position from the one it currently has. Simple, but really important. Much like the next menu...
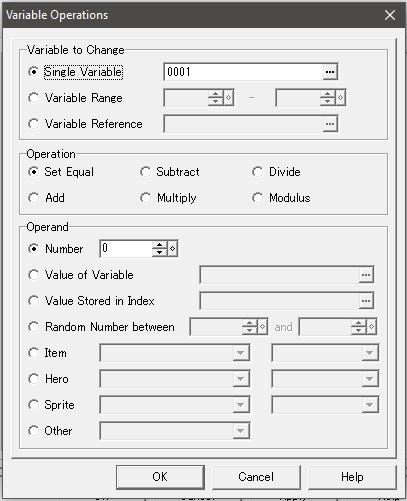
Variable Operations is where all the math fun times happen. So, much like with switches, you can either address a single variable, a series of variables, or a variable that is pointed to by the value of another variable. Variables within variables.
Anyway, once you've picked your variable, you can apply certain mathematical operations to it - setting it to a specific value, addition, subtraction, multiplication, division, and the modulo operator. What is the modulo operator? Well, to make it really simple, it's what's left over after you divide a number by another number. So, let's for instance take the number 23, and put it modulo 7. That would be 2, because 7 goes into 23 three times, that's 21, and that means 2 is left over. Now, you might wonder, what the hell is that used for? It really depends. Some times, you just really need that operator, and when you do, you'll say "god bless the modulo operator".
Finally, you need to figure out your operand, where you have a few options. You can use a hard set number, obviously. Then, you can use the value of a certain variable. Also, you can use the value of a certain variable as an index that points to a different variable, the value of which is then used. Fucking goofy ass shit, but it comes in handy. You can use random numbers, which are always useful. And finally, you can do a whole bunch of stuff with the current game state. You can use the number of owned or equipped items of a certain type (so, for instance, you could use the number of equipped wooden swords as an operand if you really needed to). You can use basically every value associated with any given hero in your game, be it level, experience, current HP, max HP, current MP, max MP, Attack, Defense, Intelligence, Agility, and even the item numbers of the hero's currently equipped gear! Then, you can do all sorts of stuff with sprites - sprites being the hero, the three vehicles, and the event you're currently working on. From those sprites, you can use the map ID, the coordinates (both X and Y), the way they're facing (1 is south, 2 is west, 3 is north and 4 is east), and the screen-relative X and Y coordinates (so where the event is relative to the screen). And that's not all! You can also use: The amount of money the party has, the seconds on timer 1, the seconds on timer 2, the size of the party, the number of saves, the number of battles, the number of victories, the number of defeats, the number of escapes, and the amount of ticks (milliseconds, apparently) in the currently playing MIDI track.
Christ, that's a lot of numbers. No doubt can you make some crazy shit happen with that kind of stuff, but thinking it up has to be insane.
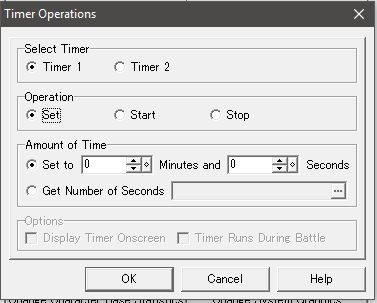
Next, we have Timer Operations. This is another fairly straightforward set of options. You're given two timers to use at any given time. With these timers, you can either set the amount of time, you can start them, or you can stop them. When setting the time, you can either set it directly or once more get your value from a variable. When starting the timer, you're also given the options to make the timer visible on screen and to have it run during battles or not. Fairly easy. We've seen this used a few times in VD2 already, with trying to rescue little Nyria's mother, or escaping Alyda's tower and rescuing the statue-ified Valnar and Alaine as Asgar.
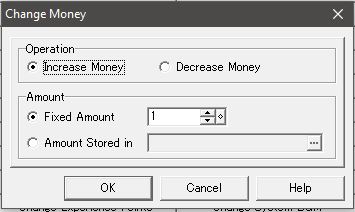
Change Money (why not Money Operations?) is another simple thing. You either increase or decrease the amount of money, either by a certain number or by an amount specified by the value of a variable. And that's it!

Item Management is similar. You pick an item, either directly or through a variable, and either add or remove a certain amount, either directly setting the amount or doing it through a variable.
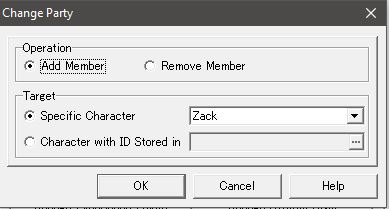
Keeping in that vein, we have Change Party. You pick a party member, either directly or through a variable, and either add them to the party or remove them from a party.

Change Experience Points can do similar things, this time with experience points. Either pick the entire party, one character specifically, or one character based on a variable, then either increase or decrease their XP points by a fixed amount or the value of a variable. You also get the option to display level up messages if level ups happen or not. Again, easy stuff.
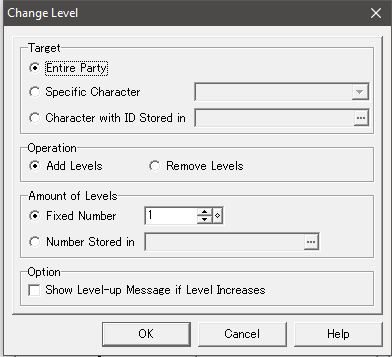
Change Level is exactly the same but with levels. Next!
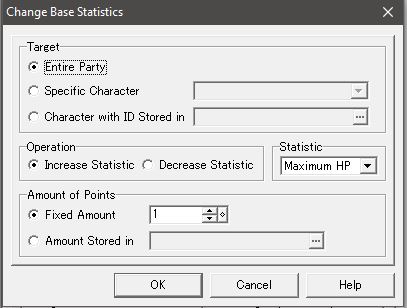
Change Character Base Statistics is where you, obviously, mess with your character's base statistics. So, again, you pick the entire party, a specific character, or a character based on a variable, then increase or decrease a certain attribute (Max HP, max MP, Attack, Defense, Intelligence, Agility), either by a fixed value or a value from a variable.
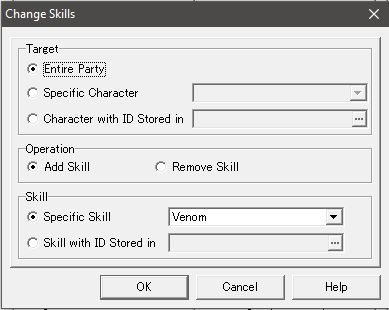
And finally, we have Change Skills. This lets you change skills, again, obviously. Like always, you pick the entire party, a specific character, or a character based on a variable, and then you either add or remove a skill, either picking the skill directly or basing it on the skill ID and a value stored in a variable.
So, that's the first of six rows of event commands. Will the following ones be more complex or simpler? I have no idea! Tune in next time to find out!
And remember, if you have any questions about certain commands, just ask! I'll be glad to answer, because it means you're actually interested in this stuff.